

To create a LinkedIn company profile, sign in to your personal LinkedIn account, open the For Business menu, choose Create a Company Page, and select Company. Enter your business name, public URL, website, industry, size and type, upload a logo, tick the verification box and click Create page. Then complete the details, add admins and start posting. You can have the page live in one sitting.
LinkedIn calls it a Page, not a profile, which is why so many owners get stuck. They search for a business profile, land on the personal sign-up form and end up with a profile in the company’s name. LinkedIn expects a profile to represent a real person, so a company needs a Page instead. Others create the Page, leave it half empty and never post, which looks worse than having no presence at all.
This guide first explains how a company page differs from a personal profile and what to prepare. Then it walks through four steps: create the page, complete it, add admins and your first followers, and post and track results. At Purple Word Box, a South African PR and communication agency, we help businesses and leaders build their LinkedIn presence, so the advice below reflects what makes a page work in practice.
Company page or profile: what you are setting up
A LinkedIn company profile, officially a LinkedIn Page, is your organization’s public home on the platform. It is separate from any individual’s profile, it is free, and people follow it to see your news, services and jobs.
What a company page does for you
A Page shows who your business is in one place: what you sell, who works there and what you have to say. It supports several admins, so the page does not depend on one person’s account. It also gives you analytics on visitors, followers and posts. Think of it as a supplement to your website that shows up where your buyers, partners and future employees already spend time.
Company page vs personal profile
The two are built for different jobs, and you need both.
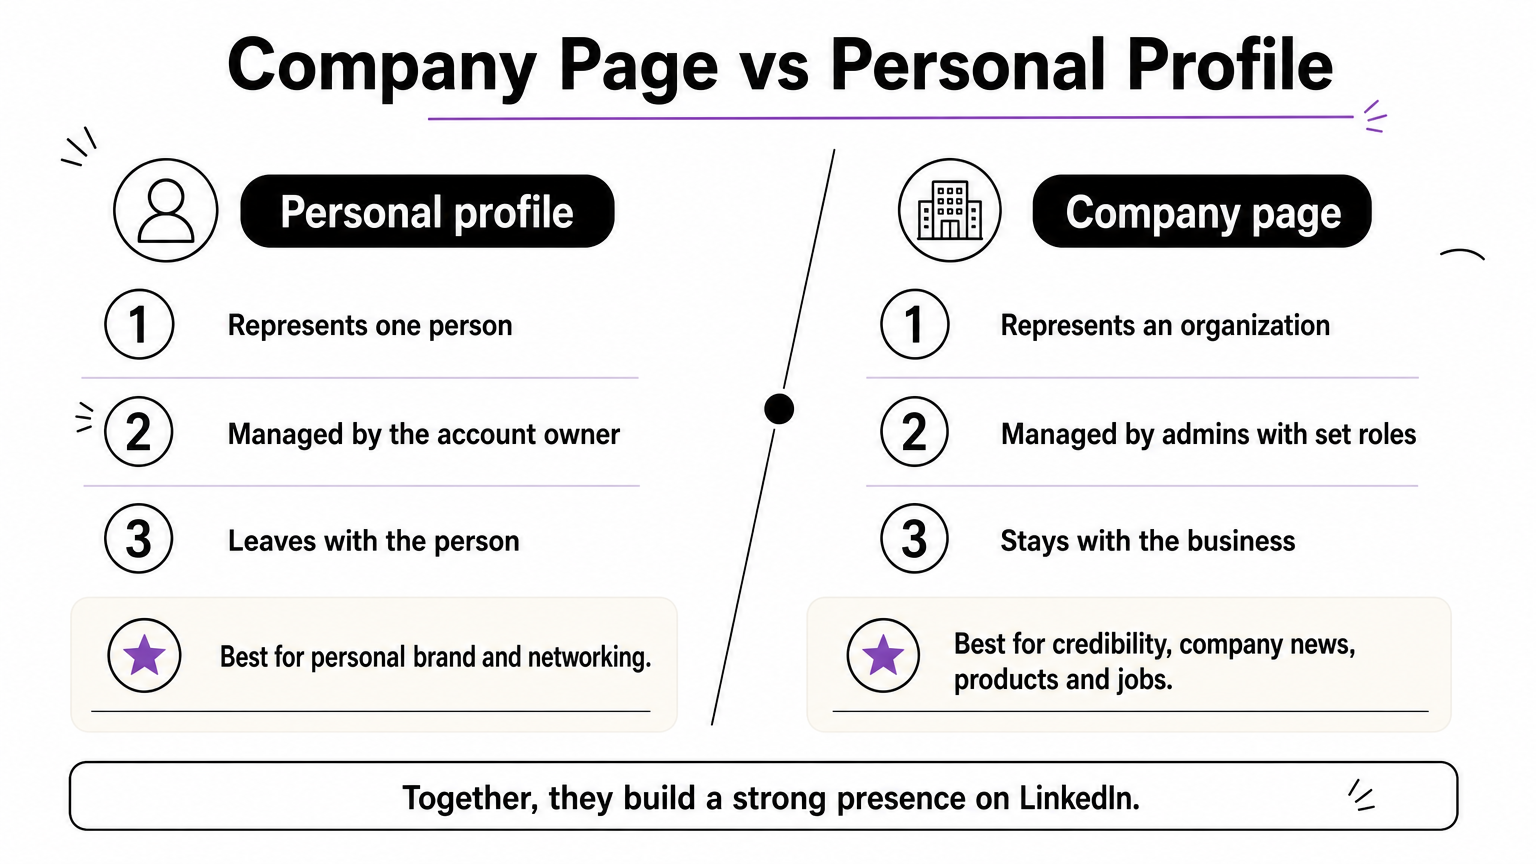
| Personal profile | Company page | |
|---|---|---|
| Represents | One person | An organization |
| Audience | Connections and followers | Followers |
| Managed by | The account owner | One or more admins with set roles |
| Ownership | Belongs to the person and leaves with them | Stays with the business |
| Best for | Personal brand and networking | Credibility, company news, products and jobs |
| Cost | Free | Free |
Create a Page for the company and keep profiles for people, never the other way around.
What you need before you start
Gather these items first so you do not stall halfway through the form:
- A personal LinkedIn account with your real name, photo and a confirmed email address
- An email address on your company domain, which is the safest route
- Your logo as a square image (LinkedIn recommends 400 x 400 pixels)
- Your website address
- A one-line tagline and a draft About section
- The page name and URL you want to use
Step 1. Create the page
Create the page from your personal account by choosing Company in the page setup form. The whole step takes a few minutes, and the page can go live as soon as you submit it.
Open the setup form
Follow these steps, which match LinkedIn’s own help page:
- Log in to your personal LinkedIn account.
- Click the For Business icon at the top right of your homepage and choose Create a Company Page.
- Select Company. The other options are Showcase page and Educational institution.
- Enter your company name, public URL, website, industry, company size and company type.
- Upload your logo and add a tagline.
- Tick the verification box confirming you are an authorized representative of the business.
- Click Create page.
Pick a name and URL that last
Your URL will look like linkedin.com/company/yourname. Use the trading name people actually search for, and match it to your website and other social handles. Choose a URL you will not want to change, because it goes on email signatures, proposals and business cards.
Be honest with the size and industry fields. Pick the smallest size band that fits and the industry your customers would use to describe you. Exaggerating makes the page look less credible, not more.
Treat the name and URL as permanent, because every link you share will point to them.
Step 2. Complete the page details
Fill in every field LinkedIn offers, because a complete page is easier to find and gives visitors a reason to follow. LinkedIn reports that fully completed pages tend to get more weekly views than incomplete ones.
Add a logo, banner and tagline
Upload a square logo at 400 x 400 pixels and a wide banner image that shows your work, team or product. LinkedIn’s image specifications page lists the current banner size, so check it before you design. Your tagline is capped at 120 characters and sits near the top of the page, so say what you do and for whom. "Cloud accounting for freelancers and small businesses" works better than a slogan.

Write an About section people read
The About section allows up to 2,000 characters, but visitors see only the first lines before "see more". Put the most important sentence first, then add proof and a way to get in touch. Copy this outline and fill it in:
[Company] helps [audience] achieve [result] through [services].
Founded in [year], we work with [client types] in [industry or region].
What we do: [service 1], [service 2], [service 3].
Why clients choose us: [one specific, checkable proof point].
Talk to us: [website] | [email]
Write the way you would explain the business to a new client. Use the terms your buyers search for, but keep the sentences natural. If it sounds repetitive, cut it.
Fill in the smaller fields
These small fields take ten minutes and help the page show up in more searches:
- Specialties: add up to 20 that match your services
- Location and contact details: add your address, phone number and founding year
- Hashtags: associate up to three relevant ones with the page
- Custom button: choose an action such as Visit website or Contact us
A complete page turns a visitor’s curiosity into a follow, an enquiry or an application.
Step 3. Add admins and invite your first followers
Add at least two admins, then bring in your first followers from people who already know the business. An empty page with no admins and no audience stalls quickly.
Set up admins
Open the Admin tools menu on your Page and add colleagues under the right role. A super admin has full control, including adding and removing other admins, so give that role to as few people as possible. Content-focused roles let marketing staff post without touching settings. Having two admins means a resignation or a locked account does not leave you out of your own page. Review the list every few months and remove people who have left the business.
Invite your first followers
Start with people who already know you. Use the invite option in your Page’s admin tools to ask your connections to follow, and share the page link in your email signature, website footer and newsletters. Ask staff to list the company as their current employer on their own profiles so the page shows who works there.
Your team matters here. LinkedIn says employees typically have about 10 times more connections than a company page has followers, so every employee who reshares a post widens your reach. Make it easy by sending them a short list of posts each week with a suggested line they can personalize.
Your first followers come from people who already trust you, so ask them directly.
Step 4. Post, track and keep it current
A page earns its keep through regular, useful posts. Start with a realistic rhythm you can keep up, and check your analytics monthly to see what works.
Publish your first posts
Before you announce the page, publish four or five posts so new visitors find a page with substance. A good starter mix:
- A welcome post explaining what you do and for whom
- An introduction to your team or founder
- A practical tip drawn from your expertise
- A project or milestone update
- An event, job or product announcement
LinkedIn’s guidance leans toward frequent posting, and it has reported that about 20 posts a month can reach roughly 60 percent of your unique audience. Start with two or three posts a week if daily is unrealistic. Weekday mornings, Tuesday to Thursday, tend to perform well, so try those slots in your audience’s time zone (South African Standard Time for most local businesses) and let your analytics settle the question.
Track results and keep the page current
Once a month, check visitor, follower and post analytics. Note which topics get comments and which formats get ignored, then do more of the first. Update the page whenever your services, address or team change, and reply to comments quickly.

Consistency is the part most small businesses struggle with. Our Social & Profile service covers LinkedIn profile management and thought leadership posts, for companies and for the leaders behind them.
A page that posts steadily and answers comments looks like a business that is open for work.
Your next step with LinkedIn
A LinkedIn company profile takes four moves: create the page from your personal account, complete every field, add admins and first followers, then post and review on a steady rhythm. The setup is quick. What separates a useful page from an empty one is the content that follows.
If you would rather hand the writing to a specialist, get in touch with Purple Word Box and tell us what you want your page to achieve. We will give you honest advice on what is realistic and what it will take.